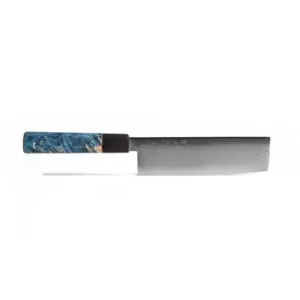
A Japanese knife does not go blunt overnight. It fades. The tomato skin that used to part at a touch starts to dent first. The onion slides a little before the edge bites. Most people put up with that for months, then decide sharpening must be difficult. It is not. It takes twenty minutes, a whetstone and a bit of patience the first time, and after three or four sessions your hands know what to do.
This is the method we teach at Oishya, written for a home cook sharpening a double-bevelled Japanese chef’s knife on a combination 1000/6000 stone. If you can hold a pencil at a steady angle, you can do this.
When does a Japanese knife need sharpening?
Use the tomato test. Rest the edge on a ripe tomato and draw it back gently without pressing down. A sharp knife catches the skin straight away and opens it. A tired one skates. If yours skates, it is time.
For most home cooks that is three or four times a year. If you cook every day and do a lot of vegetable prep, it may be closer to every two months. Harder steels such as SG2 hold their edge for longer between sessions; softer, tougher steels need a little more frequent attention but are quicker to bring back.
Please leave the pull-through sharpener, the electric sharpener and the steel honing rod in the drawer. Pull-through and electric sharpeners grind a wide, coarse angle that suits a German knife and quietly ruins the fine geometry of a Japanese one. A steel rod is designed for softer Western blades; on a hard Japanese edge it tends to cause tiny chips. A whetstone is slower and kinder, and it is the only tool you need.
What you need
A combination whetstone with a 1000 grit side and a 6000 grit side covers everything a home kitchen needs. The 1000 side does the real work, raising a fresh edge on a dull knife. The 6000 side refines and polishes that edge so it glides. Our King KW-65 1000/6000 is the stone we recommend to almost everyone starting out, and the King HT-65 PRO is the same pairing for those who want a little more. If an edge is chipped or very dull, a coarser #800 stone removes metal faster before you move on to the 1000.
You will also want a bowl or tray of water big enough to submerge the stone, a damp tea towel or a rubber stone holder so the stone does not move, a permanent marker, and a cork, a wine cork or a piece of soft wood for finishing.
Step 1. Soak the stone
Put the stone in water and leave it until the small air bubbles stop rising, usually about ten minutes. A soaked stone works with a thin layer of water and a fine grey slurry on its surface. That slurry is the abrasive doing its job, so leave it there and simply add a splash of water whenever the surface starts to look dry.
Set the stone on its holder or on the folded damp towel, 1000 side up, with the long edge facing you. It must not slide. If it moves, everything else becomes harder.
Step 2. Find your angle
Japanese kitchen knives are sharpened at a fine angle, roughly 10 to 15 degrees on each side. Western knives sit nearer 20. That narrower angle is why a Japanese knife feels so much sharper, and it is the one thing worth getting consistent.
Degrees are hard to picture, so think in millimetres instead. Lay the knife flat on the stone, then lift the spine. The height of the spine above the stone sets the angle, and it depends on how tall your blade is. For a typical chef’s knife with a blade about 45mm tall at the heel, a 15 degree angle puts the spine roughly 12mm above the stone, about the height of four £1 coins stacked together. At 12 degrees it is closer to 9mm.
If you are unsure, aim for around 15 degrees. It is forgiving, durable and plenty sharp for a home kitchen. What matters far more than the exact number is holding the same angle on every stroke.
Step 3. Colour the edge with a marker
Run a permanent marker along the bevel, the narrow shiny strip just above the edge, on both sides. After your first few strokes, look at it. If the ink has gone right down to the edge and up to the top of the bevel, your angle matches the existing one. If only the top of the bevel is clean, lift the spine a little. If only the very edge is clean, lower it slightly. It is the quickest way we know to learn what the right angle feels like.
Step 4. Sharpen the first side on the 1000 grit
Hold the handle in your dominant hand with your index finger resting on the spine or your thumb on the flat of the blade near the spine. Place two or three fingertips of your other hand flat on the blade, just above the edge. Those fingertips are where the pressure goes.
Work the blade in sections rather than trying to sharpen it all at once. Start at the heel, then the middle, then the tip. For each section, push the blade along the length of the stone and draw it back, keeping the angle steady, with light, even pressure. Around ten to fifteen strokes per section is a good start. As you reach the tip, lift the handle very slightly so the curve of the blade stays in contact with the stone.
Keep the pressure gentle. Roughly the weight you would use to press a stamp onto an envelope is enough on the 1000 side. Pressing harder only makes the angle wobble.
Step 5. Feel for the burr
The burr is how you know a side is finished. As you grind one side, a tiny lip of metal curls over onto the other side of the edge. You cannot usually see it, but you can feel it.
Turn the knife over and rest the pad of your thumb on the flat of the blade, then draw it very gently across the edge, from the spine towards the edge and off it. Never along the edge. If you feel a faint rough catch, like a fingernail on fine sandpaper, that is the burr. Check the heel, middle and tip. When you can feel it along the whole length, that side is done. If one section has no burr, go back to it.
Step 6. Repeat on the other side
Turn the knife over and do exactly the same, section by section, at the same angle, until a burr forms along the whole length of the first side. Count roughly how many strokes you used on side one and use about the same on side two. With a double-bevelled knife the aim is two equal bevels.
Step 7. Refine on the 6000 grit
Turn the stone over to the 6000 side and wet it. The fine side does not need soaking for long; it needs a wet surface. Repeat the process with even lighter pressure and fewer strokes, perhaps five to ten per section on each side. Very little metal comes off now. The strokes polish the scratches the 1000 left behind and shrink the burr.
Finish with a few single, alternating strokes, one on each side, getting lighter each time. The edge should start to look bright and even along its length.
Step 8. Remove the last of the burr
Even after the 6000, a whisper of burr often remains. Draw the edge once, gently, through a wine cork or along the corner of a piece of soft wood, as though slicing a sliver off it. Then make two or three feather-light strokes on the 6000 side. That is usually enough.
Step 9. Test, wash and dry
Try the tomato again, or slice a sheet of paper held up by one corner. A properly sharpened knife cuts it cleanly with no tearing. Rinse the blade, wipe it dry straight away, and rinse and air-dry the stone away from heat before you put it back in its box.
Looking after the stone
A whetstone wears into a shallow dip in the middle over time, and a dished stone puts a curve into your edge. Every few sessions, flatten it by rubbing it on a flattening plate, or on wet-and-dry sandpaper taped to a sheet of glass, until a pencil grid drawn across its surface disappears evenly. It takes two minutes and keeps every future session accurate.
The mistakes we see most often
Changing the angle mid-stroke is the big one. The cure is slowing down; speed comes later on its own. The second is pressing too hard, which rounds the very apex of the edge. The third is moving on before the burr has formed along the whole edge, which leaves a dull patch near the tip that no amount of 6000 grit will fix. And the fourth is forgetting the tip altogether. Lift the handle slightly as the curve meets the stone and the tip will come up as sharp as the rest.
If your knife has a chip you can see, or the tip has broken, start on the #800 or write to us before you begin. Our lifetime guarantee page explains how we repair knives that have had a hard time.
Frequently asked questions
How often should I sharpen a Japanese knife?
For most home cooks, three or four times a year. Use the tomato test rather than the calendar. If the edge skates on the skin, it is time.
What angle should I sharpen a Japanese knife at?
Between 10 and 15 degrees on each side. Around 15 degrees is the most forgiving choice for a home kitchen. Consistency matters more than the exact number.
Do I need to soak my whetstone?
A soaking stone such as the King KW-65 should sit in water until the bubbles stop, about ten minutes. Keep the surface wet with a splash of water as you work.
Can I use a honing rod on a Japanese knife?
We do not recommend it. Steel rods suit softer Western blades and can chip a hard Japanese edge. A few light strokes on the 6000 side of your stone does the same job far more gently.
Which grit should I start with?
Start on 1000 for a knife that is simply dull. Use #800 first only if the edge is chipped or very worn. Finish on 6000.
Our Knife School covers sharpening alongside the other basics of looking after a Japanese knife. And if you are still choosing a stone, the 1000/6000 is the one we would put in your hands first.
Handcrafted Japanese Knives by Oishya
Forged by master craftsmen in Seki and Sakai, Japan. Free worldwide shipping over £270 • 100-day money-back guarantee • Lifetime warranty